How to Check a Boat for Leaks Out of Water | Leak Detection 2025
To check for leaks in a boat that is out of the water, first inspect the entire hull for any cracks or holes. If any are found, use a sealant to repair them. Next, fill the boat with water and let it sit for several hours.
Check the water level periodically to see if it has decreased at all. If it has, there is likely a leak somewhere in the boat. To locate the leak, have someone pour a bucket of water over different areas of the hull while you observe from inside the boat.
The area where leaking occurs will be evident by seeing an influx of water inside the vessel.
- Inspect the boat’s hull for any cracks or holes
- These can be difficult to see, so run your hand along the hull to feel for any irregularities
- Check the boat’s bilge area for any water accumulation
- The bilge is typically located near the back of the boat and houses all of the electrical components
- Inspect all of the boat’s hoses and fittings for leaks
- Pay close attention to areas where two different materials meet, such as where metal meets plastic or rubber
- Have someone else spray a hose at various points on the boat while you watch from inside the cabin for any leaks that may appear
Boat Taking on Water While Sitting
If you’re a boat owner, the last thing you want is for your vessel to start taking on water while it’s sitting in the water. Unfortunately, this is a relatively common problem that can occur for a number of reasons. In this blog post, we’ll go over some of the most common causes of boats taking on water while they’re sitting in the water, as well as what you can do to prevent it from happening.
One of the most common reasons boats take on water while sitting in the water is because of leaks. Leaks can occur in any number of places on a boat, from holes in the hull to cracks in seals and gaskets. If you suspect your boat has a leak, it’s important to have it repaired as soon as possible before it gets worse and starts taking on more water.
Another common cause of boats taking on water while they’re sitting in the marina is due to poor drainage. If your boat doesn’t have proper drainage systems installed, rainwater and melting snow can easily pool inside your vessel and start causing problems. To avoid this issue, be sure to install proper drains onboard your boat and keep them clear of debris so they can work properly.
Finally, if you live in an area with high tides or strong currents, your boat may be at risk for flooding even if there are no leaks or drainage issues present. When tide levels rise or currents become stronger, they can push large amounts of water into your boat through any openings that are present (even small ones). This can quickly lead to serious flooding onboard and should be avoided at all costs.
If you think your boat might be at risk for taking on water while sitting in the water, there are several things you can do to prevent it from happening. First, make sure all potential sources of leaks are repaired immediately so they don’t get worse over time and cause more damage. Second, ensure proper drainage systems are installed onboard and working properly so excess rainwater doesn’t become an issue.
Finally, if you live in an area with high tides or strong currents , consider moving your boat to a different location where these conditions aren’t present to reduce the risk of flooding .
Boat Leaking Water Through Transom
If your boat has been leaking water through the transom, there are a few things that you can do to try and fix the issue. First, check the transom for any cracks or holes. If you find any, you’ll need to seal them up with marine-grade epoxy or another type of sealant.
Once the cracks are sealed, you can try filling the voids with expanding foam. This will help to create a watertight seal and prevent further leaks. If your boat is still leaking water, it’s likely that the leak is coming from somewhere else on the hull.
Try inspecting all of the seams and caulking to make sure that they’re properly sealed. You may also want to check for any loose fittings or hoses that could be causing water to leak into the hull.
How to Find Leak in Aluminum Boat
If you have an aluminum boat, you may be wondering how to find a leak. There are a few things you can do to help locate the source of the leak. First, check the seams and rivets on your boat.
If you see any cracks or gaps, these are likely the source of the leak. You can also try using a pool of water and a flashlight to help locate leaks. Place the pool of water under the boat and shine the flashlight onto the hull.
If you see any light shining through, this is likely where the leak is coming from. Once you have located the source of the leak, you can repair it with sealant or by replacing damaged parts.
Boat Taking on Water With Plug in
If you are out on the water and your boat starts taking on water, there is a chance that the plug was not properly inserted. If this happens, it is important to act quickly in order to avoid sinking. Here are some tips on what to do if your boat is taking on water with the plug in:
1. Immediately turn off the engine – This will help to prevent further damage to the boat and will also make it easier for you to assess the situation.
2. assess the situation – Take a look around and see how much water has entered the boat and where it is coming from. If possible, try to identify whether or not the plug came out or if there is another leak somewhere.
3. Plug the hole – If you can identify where the water is coming from, try to plug the hole with something like a rag or a piece of cloth. This will help stop more water from coming in and will give you more time to deal with the situation.
4. Pump out the water – Once you have plugged the hole, start pumping out any water that has already entered the boat.
This can be done with a hand pump or an electric one if available.
5. Get help – If possible, call for help or flag down another vessel so they can assist you in dealing with this issue. It is always better to have someone else around when dealing with these kinds of situations!
Water Seeping Through Fiberglass
If you’ve ever had water seep through your fiberglass, you know it can be a real pain. Water seeping through fiberglass is not only unsightly, but it can also cause serious damage to your home. If left unchecked, water seepage can lead to mold growth, wood rot, and structural damage.
Fortunately, there are a few things you can do to prevent water from seeping through your fiberglass.
One of the best ways to prevent water seepage is to make sure your gutters are clean and in good condition. Clogged or damaged gutters can cause rainwater to back up and spill over onto your fiberglass.
To keep your gutters clean, be sure to remove leaves and other debris on a regular basis. You may also want to consider installing gutter guards or covers to keep leaves and other debris out of your gutters altogether.
Another way to prevent water seepage is by sealing any cracks or gaps in your fiberglass with caulk or sealant.
Even small cracks can allow water into your home, so it’s important to seal them as soon as you notice them. Once sealed, be sure to monitor the area for any new cracks or gaps that may open up over time.
If you live in an area that gets a lot of rainfall, you may also want to invest in a sump pump system.
Sump pumps are installed in the lowest point of your basement or crawl space and work by pumping water out of your home before it has a chance to seep in.

Credit: vesselvanguard.com
How Do I Test My Boat for Leaks?
Assuming you have a boat with an enclosed hull, the most common way to test for leaks is to simply fill the hull with water and look for any drips or wet spots. You can do this by filling a bucket or container with water and slowly pouring it into the hull while observing the inside and outside of the hull for any leaks. Another way to test for leaks is to use a garden hose to fill the hull with water while also looking for any leaks.
If you have a boat with an open hull (such as a kayak), you can still test for leaks by filling the hull with water and observing it for any drips or wet spots. However, it can be more difficult to spot small leaks in open hulls due to the lack of enclosed space. In this case, you may want to consider using a leak detection dye along with your garden hose to help identify any small leaks that may be present.
How Do I Find a Water Leak in My Boat?
If you think your boat has a water leak, the best place to start looking is at the hull. Check for any cracks or holes in the hull, and if you find any, use a waterproof sealant to repair them. You should also check all of the fittings and hoses on your boat for leaks.
If you can’t find any leaks at the hull or fittings, it’s possible that the leak is coming from your boat’s engine. To check for this, remove the oil dipstick from your engine and see if there is water on it. If there is, then you’ll need to take your boat to a mechanic to have the engine repaired.
How Do You Check for a Leak in a Boat Hull?
Assuming you have a fiberglass hull, the first step is to clean the area around the suspected leak. Once the area is clean, you’ll need to inspect it closely for any cracks or holes. If you find a crack or hole, you can use a putty knife or similar tool to fill it in with epoxy resin.
Once the epoxy has cured, you can then sand and paint over it.
If you don’t see any obvious cracks or holes, the next step is to do a water test. To do this, simply pump some water into the hull (enough to cover the area of suspicion) and then look for any leaks.
If you see any water seeping through, then you’ll know you have a leak that needs to be fixed.
Once you’ve found the leak, repair it using the same method as above (cleaning, filling with epoxy resin, sanding and painting).
What are Common Boat Leaks?
There are many different types of boat leaks, but some of the most common include:
1. Leaks in the hull: These can be caused by holes or cracks in the hull, and can often be difficult to spot. If you notice your boat taking on water, it’s important to check the hull for any leaks.
2. Leaks in the deck: These are usually caused by cracks or holes in the decking material. Again, if you notice your boat taking on water, it’s important to check the deck for any leaks.
3. Leaks around fittings: This is a common type of leak that is often caused by loose fittings or seals that have failed.
If you notice water leaking from any fittings on your boat, it’s important to tighten them up or replace the seal.
4. Leaks in plumbing: This type of leak is usually caused by old, damaged, or faulty plumbing fixtures. If you notice water leaking from any pipes or fixtures on your boat, it’s important to have them repaired or replaced as soon as possible.
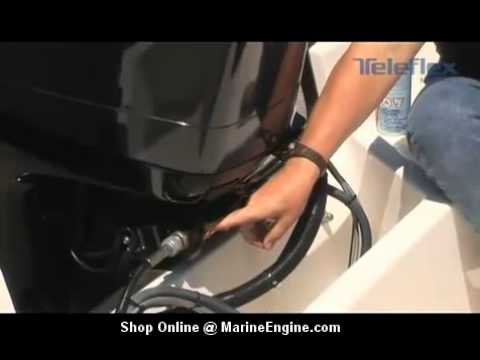
Find Your LEAK In Your BOAT Using This One SIMPLE Method!!!
Conclusion
This blog post was very helpful in teaching its readers how to check a boat for leaks out of water. By following the simple steps laid out in the post, anyone can effectively check their boat for leaks and prevent future problems.


